A step by step tutorial on building a Blog app with Python and Flask
INTRODUCTION
In this tutorial, we’ll be building a web application for blogging from start to finish using python and flask.
Flask is a micro python web framework that contains a collection of libraries and frameworks used to develop apps easily without worrying about low-level details like protocol, and thread management among others. We will also use flask-login and flask-sqlalchemy to manage the user authentication/authorization and database sections of our app respectively.
Since we will be focusing on building the backend of the application, we will use bootstrap to optimize the frontend. Bootstrap is a free and open-source frontend web framework that is designed to simplify the development process of responsive and mobile-first websites.
Users of the app would be able to signup, login, log out, view articles written by them and other users and post, edit and delete articles written by them.
PREREQUISITE
Basic knowledge of python 3 concepts including data types, functions, conditional statements, iterative statements and object-oriented programming.
Python 3 environment setup on your local machine. If not, here is a step-by-step tutorial.
A fundamental understanding of HTML concepts
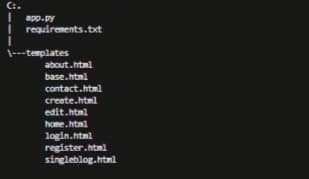
APP BLUEPRINT
Below is a picture of what the project directory will look like:
STEP 1 – Creating a virtual environment
According to GeeksforGeeks, a virtual environment(venv) is a tool that enables developers to keep dependencies required for different projects separate by creating an isolated environment for them. It makes it easy to install the exact version of python packages needed for a project without flooding the main python directory with unnecessary python packages. You can learn more about the uses of virtual environments here.
To use a virtual environment, you must have the virtualenv package installed in your base python directory. If you do not have it installed, open the terminal and run the command below:
pip install virtualenv
This command installs virtualenv.
In the terminal, create a new project directory, and name it BLOGAPP. Navigate into the BLOGAPP directory. Type in the command below and press the enter key.
python -m venv env
The above command creates the virtual environment.
To use a virtual environment, it needs to be activated. To activate your venv, run the command particular to your operating system of the following:
ON A MAC OR LINUX MACHINE
source env/bin/activate
ON A WINDOWS MACHINE
source env/scripts/activate
STEP 2 – INSTALLING FLASK
In this step, we will be installing flask using the pip installer.
With your virtual environment activated, use pip to install flask in the terminal with the command below:
pip install flask
NOTE: When the virtual environment is active, a prefix usually the name of the virtual environment in this case ENV will be shown before the terminal prompt.
Once the installation is complete, you will see a line similar to the one below as the last line of output:
Successfully installed Jinja2-3.1.2 MarkupSafe-2.1.1 Werkzeug-2.2.2 click-8.1.3 colorama-0.4.6 flask-2.2.2 importlib-metadata-5.1.0 itsdangerous-2.1.2 zipp-3.11.0
Once the installation is completed, run the command below in the terminal:
pip freeze > requirements.txt
This command is used to save all the installed dependencies in a text file, here it is called requirements.txt Having a requirements.txt file is important because it prevents cases of dependency conflict and can help anyone trying to interact with your code base install the necessary dependencies in the correct versions.
STEP 3 – INITIALIZING THE FLASK APP
In the BLOGAPP directory, create a new python file app.py. This is the file where you set all the variables that are needed for the application to run. Type the code below inside the file:
from flask import Flask
app = Flask(__name__)
Here, you import the Flask object from the flask extension earlier installed, this object is then used to create the flask application instance.
With your virtual environment activated, set the app.py file as the flask app by assigning it to the FLASK_APP environmental variable as shown below. Then run the app with flask run
$ export FLASK_APP=app
$ flask run
You would see an output similar to the one below in the terminal.
* Serving Flask app 'app'
 * Debug mode: off
WARNING: This is a development server. Do not use it in a production deployment. Use a production WSGI server instead.
 * Running on http://127.0.0.1:5000
Press CTRL+C to quit
The output holds several pieces of information which include:
'app'- the name of the application that is running. Remember you set the app instance to a variableappin the app.py file?Debug mode: off- implies that the flask debugger is not runningthe app is running on your local machine on a URL
http://127.0.0.1:5000where127.0.0.1is your machine's IP address and:5000is the port it is running on.
Now, that you've seen how to run a flask application, we move on to creating the database.
STEP 4 – SETTING UP THE DATABASE
In this step, we will be setting up the database that will be used to store the user and post data. As earlier stated, flask-sqlalchemy will be used.
Install flask-sqlalchemy by running the command below in the terminal. Make sure your virtual environment is active:
pip install flask-sqlalchemy
Once the installation is done, close the terminal and open the app.py file. Type the code below into the file:
from flask import Flask
from flask_sqlalchemy import SQLAlchemy
import os
base_dir = os.path.dirname(os.path.realpath(__file__))
app = Flask(__name__)
app.config["SQLALCHEMY_DATABASE_URI"]='sqlite:///'+ os.path.join(base_dir,'blog.db')
app.config["SQLALCHEMY_TRACK_MODIFICATIONS"] = False


db = SQLAlchemy(app)
Here, you import the SQLAlchemy class from the flask-sqlalchemy extension installed. This class gives us access to various SQLAlchemy classes and functions that you will be needing to build this app. After, you import the os module which is an operating system interface, it would be used to create a file path for the database file.
The os.path.realpath function gets the file path of the __file__ variable which is the module that is being imported. That is, it gets the path to the app.py file you are currently in. os.path.dirname gets the directory name from the path os.path.realpath sends to it. The directory name is then stored in the base_dir variable.
Then, two SQLAlchemy configuration keys are used to configure SQLAlchemy to the flask app app. They are:
SQLALCHEMY_DATABASE_URI - this key specifies the database URI that you want SQLAlchemy to establish a connection with. In this case, we will just construct the URI. The os.path.join method intelligently joins the base directory path base_dir to blog.db which is going to be the name of your database file. The output is then concatenated with the sqlite:/// prefix. This file will be created once you initiate the database.
SQLALCHEMY_TRACK_MODIFICATIONS – this key tracks modification made to the database. It is not required for the app we are building hence, it is set to False.
Afterwards, a database object is created by integrating the app with the sqlalchemy class as in SQLAlchemy(app) .
Now that we have created the database object and have established its connection to the app, we will then add a table; article to the database. Add the following code to the app.py file:
from datetime import datetime
....
class Article(db.Model):
    __table_name__ = "articles"
    id =  db.Column(db.Integer, primary_key=True, autoincrement=True)
    title = db.Column(db.String(100), nullable=False)
    content = db.Column(db.String, nullable=False)
    date_created = db.Column(db.DateTime, nullable=False, default=datetime.utcnow())

    def __repr__(self):
        return f"Article <{self.title}>"
This table is represented by a Model which inherits from a base class the database object db makes available.
The db.Column class is used to define columns for a table in this case the Article table. The first argument it takes is usually the type of column you want to create. The following columns are defined in the articles table:
id– this column accepts only data that is an integer which is made possible because of thedb.Integerargument passed to it.primary_key=Truesets this column to be the table’s primary key,autoincrement=Truegenerates a unique id for every entry added to the table.title– stores the title of the article. It is a string that accepts a maximum of 100 charactersdb.String(100),nullable=Falsemeans the column cannot be NULL in other words empty.content– stores the body of the article. A string with no maximum number of characters, nullable is set to false.date_created– stores a python datetime object.default=datetime.utcnow()sets the column to a default value ofdatetime.utcnow()when no value is entered into the column.datetime.utcnow()is the current date and time when the user adds the post to the database.
The __repr__ function gives each object a string representation which is usually very useful in debugging.
Save the app.py file. Open the terminal, you will initiate the database there. Make sure your virtualenv is activated.
Type python in the terminal and then hit enter, this opens an interactive python shell in the terminal. This shell runs in the context of the flask app. Enter the code below in the shell
>>> from app import db, app
>>> with app.app_context():
...    db.create_all()
First, you import the db and app from the app.py file. After which you initiate the database within the app context. Hit enter twice after the last line, this creates the database file. You can leave the python shell by running exit().
Close the terminal and navigate to the project directory, you’ll see a new file blog.db in the directory. This is the database file.
Now that we have our database created, we can start building the routes we will need for this application.
STEP 5 – TEMPLATING
In this section, we will be creating the routes for the app together with the corresponding HTML files that would be rendered when the route is opened. Routing simply means mapping a URL to a function that will handle the logic and requests of that URL. In flask, functions that handle URL logic are called view functions and are usually decorated with the @app.route() decorator which converts the function return value into an HTTP response.
The app.route() decorator usually takes two arguments which are; the URL path and a list of accepted HTTP methods for the URL. The latter is not always required as it is set to a default GET method.
The templating engine used by flask is Jinja. Jinja allows python developers to build templates that can power the front end of the application. It consists of some useful features that are not available in standard HTML such as template variables, if statements, for loops and template inheritance.
Open the terminal and cd into the BLOGAPP directory, then create a new sub-directory - templates. This subdirectory will hold all the HTML templates that will be used in this app, you would create those later. It is worthy of note however that this directory must be called templates because flask searches for a ‘templates’ folder to load web templates. If the folder containing your templates is called anything other than this, flask would not find it and hence the templates would not be rendered.
Next, create a new HTML file base.html in the templates sub-directory. This file will contain an HTML skeleton which has all the HTML syntax common to every page on the app and the HTML files for other pages will build upon it, this is made possible by the template inheritance property of jinja.
Open the base.html file and type in the code below:
<!DOCTYPE html>
<html lang="en">
  <head>
    <meta charset="UTF-8" />
    <meta http-equiv="X-UA-Compatible" content="IE=edge" />
    <meta name="viewport" content="width=device-width, initial-scale=1.0" />
    <style>
      .create-button {
        margin-left: auto;
      }
      .btn-outline-light a {
        border-color: black;
        color: white;
      }
      .create-button a:hover {
        text-decoration: none;
        color: black;
      }
      .link {
        color: #f8efef;
      }
      .link:hover {
        font-weight: 500;
        color: #f8efef;
      }
      li:hover {
        text-decoration: underline;
      }
      .bg {
        background: #863d48;
      }
      .alert {
        margin-top: 10px;
      }
    </style>
    <link
      rel="stylesheet"
      href="https://cdn.jsdelivr.net/npm/bootstrap@4.0.0/dist/css/bootstrap.min.css"
      integrity="sha384-Gn5384xqQ1aoWXA+058RXPxPg6fy4IWvTNh0E263XmFcJlSAwiGgFAW/dAiS6JXm"
      crossorigin="anonymous"
    />
    {% block css %} {% endblock %} {% if title %}
    <title>{{title}}</title>
    {% else %}
    <title>Flask Blog</title>
    {% endif %}
  </head>
  <body>
    <nav class="navbar navbar-expand-lg bg">
      <div class="container-fluid">
        <span class="navbar-brand">BlogHub</span>
        <button
          class="navbar-toggler"
          type="button"
          data-bs-toggle="collapse"
          data-bs-target="#navbarSupportedContent"
          aria-controls="navbarSupportedContent"
          aria-expanded="false"
          aria-label="Toggle navigation"
        >
          <span class="navbar-toggler-icon"></span>
        </button>
        <div class="collapse navbar-collapse" id="navbarSupportedContent">
          <ul class="navbar-nav me-auto mb-2 mb-lg-0">
            <li class="nav-item">
              <a
                class="nav-link link"
                aria-current="page"
                href="#"
                >Home</a
              >
            </li>
<li class="nav-item">
              <a class="nav-link link" href="#">About</a>
            </li>
            <li class="nav-item">
              <a class="nav-link link" href="#">Contact</a>
            </li>
<li class="nav-item">
              <a class="nav-link link" href="#">Login</a>
            </li>
<li class="nav-item">
              <a class="nav-link link" href="#">Register</a>
            </li>
<li class="nav-item">
              <a class="nav-link link" href="#">Logout</a>
            </li>
          </ul>
          <button type="button" class="btn btn-outline-light create-button">
            <a href="#"
              >New Blog <i class="fa-solid fa-pencil"></i
            ></a>
          </button>
        </div>
      </div>
    </nav>
    {% block heading %} {% endblock %} {% block content %} {% endblock %}
    <script
      src="https://code.jquery.com/jquery-3.2.1.slim.min.js"
      integrity="sha384-KJ3o2DKtIkvYIK3UENzmM7KCkRr/rE9/Qpg6aAZGJwFDMVNA/GpGFF93hXpG5KkN"
      crossorigin="anonymous"
    ></script>
    <script
      src="https://cdn.jsdelivr.net/npm/popper.js@1.12.9/dist/umd/popper.min.js"
      integrity="sha384-ApNbgh9B+Y1QKtv3Rn7W3mgPxhU9K/ScQsAP7hUibX39j7fakFPskvXusvfa0b4Q"
      crossorigin="anonymous"
    ></script>
    <script
      src="https://cdn.jsdelivr.net/npm/bootstrap@4.0.0/dist/js/bootstrap.min.js"
      integrity="sha384-JZR6Spejh4U02d8jOt6vLEHfe/JQGiRRSQQxSfFWpi1MquVdAyjUar5+76PVCmYl"
      crossorigin="anonymous"
    ></script>
  </body>
</html>
The code above contains basic HTML and some CSS for styling. Most of the styling is done with bootstrap which as earlier stated is a frontend framework. You learn more about bootstrap here.
However, some parts of the code are significant to jinja and they are:
{% block css %} {% endblock %}- This is a block that serves as a placeholder for any custom css styling that we might want to add to a particular page later. Hence, there is no need to write the entire head section again. See the point of template inheritance??
{% if title %} {% else %} {% endif %} – This is the jinja syntax for a python if statement. The HTML code for the if block comes after {% if title %} and the HTML code for the else block comes after the {% else %}. An if statement in jinja must be closed whether or not it has an else statement after it. If statements are closed with {% endif %}. If the title variable is passed to a template from the render_template function(we will be seeing this later), this title will be displayed as the title of the HTML page. If not, Flask Blog which is in the else block willl be used as the title.
{% block heading %} {% endblock %} – This block serves as a placeholder for the custom heading that you will add to each page of the app later.
{% block content %} {% endblock content %} – This block serves as a placeholder for the contents of the child template which would inherit from this template.
{{title}} – This is jinja syntax for a template variable. Variables are usually passed to the HTML files from within the view function in the main flask application.
Save and close the file.
STEP 6 - CREATING AN ARTICLE
In this step, you will add and implement the create functionality to the app. Add the code below to the end of the app.py file.
from flask import Flask, render_template, request
....
@app.route('/create', methods=['POST', 'GET'])
def create():
    if request.method == 'POST':
        title = request.form.get('title')
        content = request.form.get('content')

        new_article = Article(title=title, content=content)
        db.session.add(new_article)
        db.session.commit()

    return render_template('create.html')
The create view function allows users to post articles. It responds to GET and POST HTTP methods of the /create route. The block of code checks if the HTTP request is a POST or GET method.
For a POST request, the input fields with name 'title' and 'content' are gotten from the web form with the request.get method and are saved in the title and content variable respectively, the form will be created shortly. These variables are then passed as keyword arguments to the Article class and are used to create an article object new_article. This object is entered into the database session as in db.session.add(new_article) and is committed db.session.commit().
For a GET request, an HTML file create.html will be displayed in the browser using the render_template() function that has been imported from flask. render_template() is a helper function that does exactly what its name says- render templates. It accepts two variables, the first that is usually the name of the template it should render which in this case is create.html and the variables that should be available in the context of the template
Save and close the app.py file.
Navigate into the templates subdirectory and create a new HTML file create.html, this file will contain the HTML code for the create route. Type the code below into the file.
{% extends 'base.html'%} {% block css %}
<style>
  .base-container {
    margin: 80px;
    margin-top: 20px;
  }
</style>
{% endblock %} {% block content %}
<div class="base-container">
  <form action="{{url_for('create')}}" method="post">
    <div class="mb-3">
      <label for="exampleFormControlInput1" class="form-label">Title</label>
      <input
        type="text"
        class="form-control"
        id="exampleFormControlInput1"
        name="title"
        placeholder="Title"
        required
      />
    </div>
    <div class="mb-3">
      <label for="exampleFormControlTextarea1" class="form-label"
        >Content</label
      >
      <textarea
        class="form-control"
        id="exampleFormControlTextarea1"
        name="content"
        rows="10"
        required
      ></textarea>
    </div>
    <button type="submit" class="btn btn-primary">Post</button>
  </form>
</div>
{% endblock %}
{% extends 'base.html'%} shows that the HTML file inherits from base.html file. You replace the css block of the base template with some styling for the base-container and also the content block with the code for an HTML form. The form tag has two attributes; action and method that contain the python url_for() function written in jinja template {{}} and the HTTP request method the form accepts respectively. The url_for() is a python helper function that generates the URL to a view function based on the argument passed to it. This argument is usually the name of the view function whose URL is to be generated. The form then sends the user input to this function.
Save the file and close the file
With the flask app running, visit the following URL using your browser:
http://127.0.0.1:5000/create
You’ll see a page similar to the one below:

Enter the title and content of your choice, click on the post button. The exact same page is displayed again without any of the content you entered, we will fix this soon by creating a route that will display a single article but before that, let's add the link to create a new article to the New Blog button on the top right corner of the page. Close the browser and open the base.html file.
Add {{url_for('create')}} to the href attribute of the button tag in place of the # just as shown below, this generates the link to the URL of the create function.
...
<button type="button" class="btn btn-outline-light create-button">
            <a href="{{url_for('create')}}"
              >New Blog <i class="fa-solid fa-pencil"></i
            ></a>
          </button>
Close the base.html file and open the app.py file. Add url_for to list of imports from flask as shown below:
from flask import Flask, render_template, request, url_for
So, once a user clicks on the New Blog button, the page to post a new article is displayed. Now that we have fixed that, let's create a new route that display a single blog post.
STEP 7 - DISPLAYING A SINGLE ARTICLE
Type in the following code to the end of the app.py file.
@app.route('/article/<int:_id>')
def single_blog(_id):
    article = Article.query.filter_by(id=_id).first_or_404('Such article does not exist')
    return render_template('singleblog.html', article=article)
The URL to view a single post is quite different from the previous URL in the create function, it is known as a dynamic route. A dynamic route contains one or more parameters that accepts data in form of arguments. In this case, the id of the article that is to be displayed is the parameter as in <int:_id>. The <int:_id> part of the URL is called a variable rule, the general syntax of variable rules is <converter: variable name>. The converter can be String, Int, float among others. By default, the converter is String. Here, the Int converter is used, it converts the number in the URL into an integer.
The single_blog function queries the Article table using the filter_by method to get the data for a single article from the database, the filter_by() method filters the search with keyword arguments(kwargs). Here, it searches the id column of the Article table for an entry where it is equal to the id from the dynamic URL. first_or_404() returns the first record that matches and throws a 404 (not found) error if no record matches which means the record doesn’t exist. The result of the query which is an Article object is passed to the singleblog.html file which we will create now as a variable using the render_template function.
Close the app.py file. cd into the templates folder and create a HTML new file - singleblog.html. Type the following code into the file
{% extends 'base.html' %} {% block css %}
<style>
  .base-container {
    margin: 80px;
    margin-top: 20px;
  }
  .crud-button a {
    text-decoration: none;
    color: white;
  }
  .crud-button {
    margin-top: 20px;
  }
  .btn-primary {
    background-color: #d37684;
    border-color: #c27c86;
  }
  .btn-primary:hover {
    background-color: #b72a3f;
    border-color: #c0394e;
  }
  .btn-danger {
    background-color: red;
  }
</style>
{% endblock %} {% block heading %}
<div class="base-container">
  <h1>{{article.title}}</h1>
  <small
    >{{article.date_created.strftime('%H:%M:%S')}},
    {{article.date_created.strftime('%A %d %B %Y')}}</small
  >
  {% endblock %} {% block content %}
  <article>{{article.content}}</article>
</div>
{% endblock %}
This file inherits from base.html and contains some CSS styling in the css block. You use the article variable passed to the template from the single_blog function to display the title {{article.title}}, time {{article.date_created.strftime('%H:%M:%S')}}, date {{article.date_created.strftime('%A %d %B %Y')}} and content {{article.content}} of the article. You access these fields with membership operators and parse the datetime object article.date_created with the strftime() function.
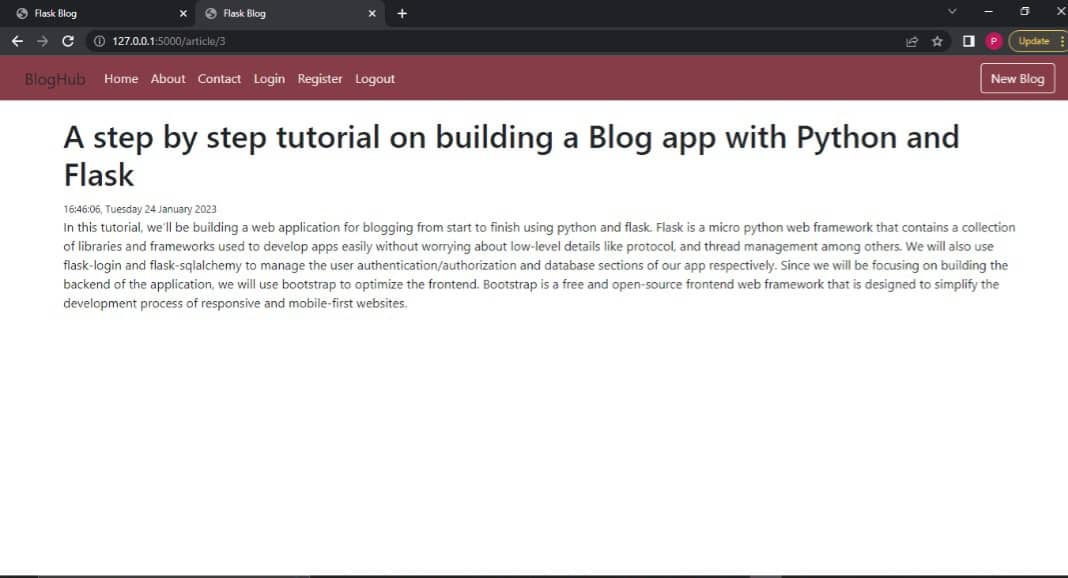
Save and close the file. Open your browser and visit the URL below:
http://127.0.0.1:5000/article/1
You will see the article you added to the database in a format similar to the following:
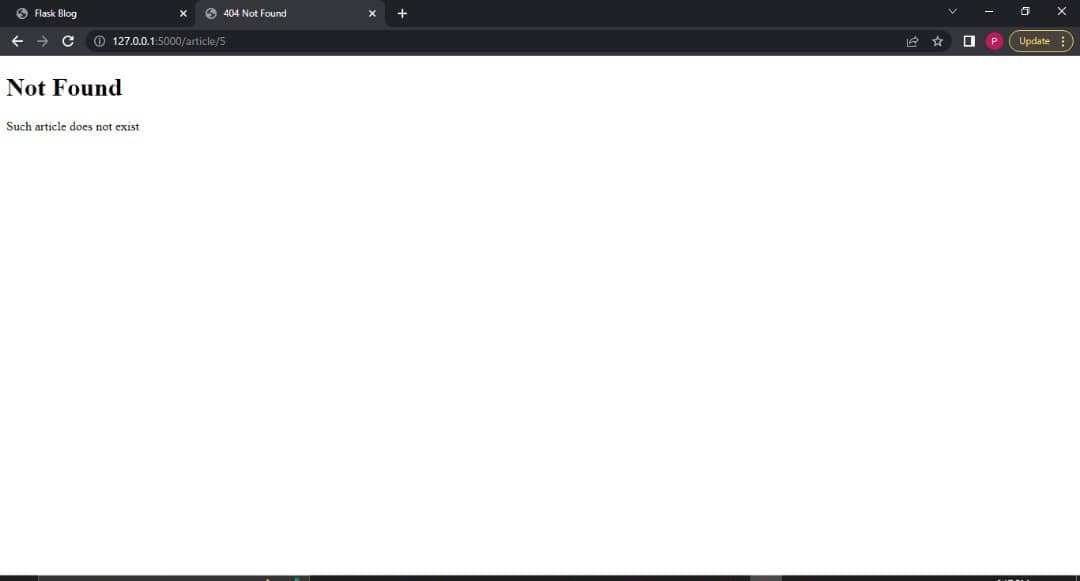
Now, visit the URL below in your browser:
http://127.0.0.1:5000/article/5
You will see another page similar to the one below which indicates that the article does not exist. You've added only one article to the database, hence there is no entry with an id of 5.
Close the browser and open the app.py file. Here, you will edit the create function. Type in the code below where necessary:
from flask import Flask, render_template, request, url_for, redirect
...
@app.route('/create', methods=['POST', 'GET'])
def create():
    if request.method == 'POST':
        title = request.form.get('title')
        content = request.form.get('content')

        new_article = Article(title=title, content=content)
        db.session.add(new_article)
        db.session.commit()
        return redirect(url_for('single_blog', _id=new_article.id))

    return render_template('create.html')
You import the redirect function from flask, redirect redirects a user to another location on the web app whose URL is its first argument. Here, it redirects to the URL for a particular blog post using the single_post function. Save the file and visit the /create route in your browser. Fill in the title and content of your choice in the field provided and click the post button, the page redirects to a page that displays the information about the article you posted.
Now that you have created a page for individual articles, you'll add another page that displays all the articles in the database.
STEP 8 - DISPLAYING ALL ARTICLES
In this route, we will be building a route and template to display all the articles in the database.
Open the app.py file and add the code below to the end of the file.
@app.route('/')
def home():
    articles = Article.query.all()
    return render_template('home.html', articles=articles )
Here, you create the home view function that is mapped to the / URL. This function queries the articles table with the query attribute using the all() method which returns all the articles in the database as list of objects. You store the query result in the articles variable and pass it to the home.html template with the render_template helper function.
Save and close the app.py file. Create a new HTML file home.html in the templates subdirectory.
Type in the code below into the file:
{% extends 'base.html' %} {% block head %}
<style>
  .content-section {
    background: #f8efef;
    padding: 10px 20px;
    border: 1px solid #dddddd;
    border-radius: 3px;
    margin-bottom: 20px;
    margin: 10px 20px;
  }
  .article-metadata {
    padding-bottom: 1px;
    margin-bottom: 4px;
    border-bottom: 1px solid #e3e3e3;
  }

  .article-metadata a:hover {
    color: #333;
    text-decoration: none;
  }
  .article-title {
    color: #444444;
  }

  a.article-title:hover {
    color: #c0394e;
    text-decoration: none;
  }
</style>
{% endblock %} {% block heading %}
<script
  src="https://kit.fontawesome.com/f0f88b9eef.js"
  crossorigin="anonymous"
></script>
{% endblock %} {% block content %} {% for article in articles %}
<article class="media content-section">
  <div class="media-body">
    <div class="article-metadata">
      <h2>
        <a
          class="article-title"
          href="{{url_for('single_blog', _id=article.id)}}"
          >{{article.title}}</a
        >
      </h2>
    </div>

    <p class="article-content">
      <span class="mr-3"
        ><small>{{article.date_created.strftime('%H:%M:%S')}}</small></span
      >
    </p>
  </div>
</article>
{% endfor %} {% endblock %}
The {% extends 'base.html' %} inherits the code from the base template. Additional css styling is added to the home page inside the head block. The content of the home page which is added inside the content block.
______ is a jinja for loop syntax, it iterates through the list of articles – the template variable passed in from the home function of app.py.
The title, date created and author which would be added later for each article will be displayed on the home page. The title has an anchor tag which would redirect to a page that displays the content of the article, a route will be created for that later.
We have now created the home route but we don’t have any article in the database yet for us to see which leads us to the next route.